Creating a Player and Tilemap
Let’s see how well you remember creating GameObjects in a Scene from the Platformer. If you need to review, visit the Platformer’s Creating a Player and Creating a Tilemap tutorials again.
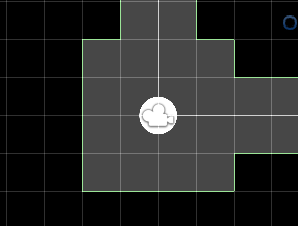
Tilemap
When creating the tilemap, be sure to add a Tilemap Collider 2D and a
Composite Collider 2D. The Composite Collider will make it so that collision is applied to the
tilemap as a whole instead of each tile individually, improving performance.
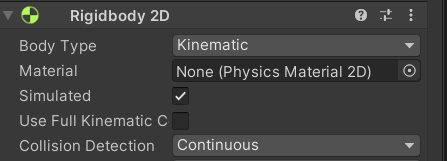
To ensure that the tilemap remains in place, be sure that you change these properties on the Rigidbody 2D that was added with the Composite Collider.
- Body Type
Kinematic - Collision Detection
Continuous.
Player
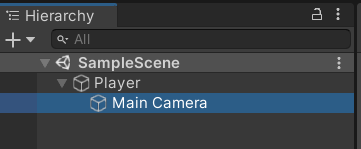
Add a Player GameObject to the Scene. I used a Circle for mine with a Circle Collider 2D and
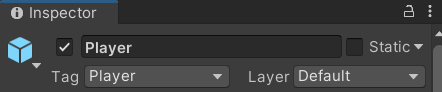
Rigidbody 2D. Be sure to tag the Player as a Player tag and to add the Main Camera
as a child of the player.
Top-Down Player Controller Script
Update()
vs. FixedUpdate()
This time (as opposed to our script in our platformer), we won’t be moving by adding forces to the Player’s
Rigidbody in FixedUpdate(). Instead, we will directly mutate the position of the
transform component, which can be done in Update(). Rigidbody code MUST go in
FixedUpdate() while everything else can go in Update().
using UnityEngine;

public class TopDownController : MonoBehaviour
{
    public float speed;
    public float maxSpeed;
    Rigidbody2D rb;
    // Start is called before the first frame update
    void Start()
    {
        rb = GetComponent<Rigidbody2D>(); // this gets the player's rigidbody component so we can change it here in the code
    }

    // FixedUpdate is called once per frame
    void FixedUpdate()
    {
        // --- Calculate User Input ---
        // A Vector2 is like a coordinate point. It has 2 numbers inside, x and y
        // the first number (x) will be -1 for left button, +1 for right button, and 0 for neither/both
        // the second number (y) will be -1 for down button, +1 for up button, and 0 for neither/both
        // Example: Vector2(0, 1) = straight up
        // Example: Vector2(-1, 0) =  straight left
        // Example: Vector2(1, -1) = diagonal direction right and down
        Vector2 direction = new Vector2(
            Input.GetAxis("Horizontal"),
            Input.GetAxis("Vertical")
        ).normalized;

        // --- Move the Player ---
        // Add force in the direction the player is pressing the buttons
        // The amount of force is controlled by the "speed" variable we made
        rb.AddForce(direction * speed, ForceMode2D.Impulse);
        // --- Cap the maximum speed ---
        // Cap Right
        if (rb.linearVelocityX > maxSpeed) // English: if player speed X is greater than our max... (right is positive)
        {
            rb.linearVelocityX = maxSpeed; // English: then make it equal to the max instead
        }
        // Cap Left
        if (rb.linearVelocityX < -maxSpeed) // English: if player speed X is less than our NEGATIVE max... (left is negative)
        {
            rb.linearVelocityX = -maxSpeed; // English: then make it equal to the NEGATIVE max instead
        }
        // Cap Up
        if (rb.linearVelocityY > maxSpeed) // English: if player speed Y is greater than our max... (up is positive)
        {
            rb.linearVelocityY = maxSpeed; // English: then make it equal to the max instead
        }
        // Cap Down
        if (rb.linearVelocityY < -maxSpeed) // English: if player speed Y is less than our NEGATIVE max... (down is negative)
        {
            rb.linearVelocityY = -maxSpeed; // English: then make it equal to the NEGATIVE max instead
        }
        // --- Stop Player from Sliding ---
        // Stop moving if not pressing any buttons
        if (direction.x == 0) // if we aren't pressing left or right
        {
            rb.linearVelocityX = 0; // set speed to 0 (aka stop moving left or right)
        }
        if (direction.y == 0) // if we aren't pressing left or right
        {
            rb.linearVelocityY = 0; // set speed to 0 (aka stop moving up or down)
        }
    }
}
We have are dividing by SPEED_UNIT because if we moved by speed every frame (60x
a second), we would go too far too quickly.
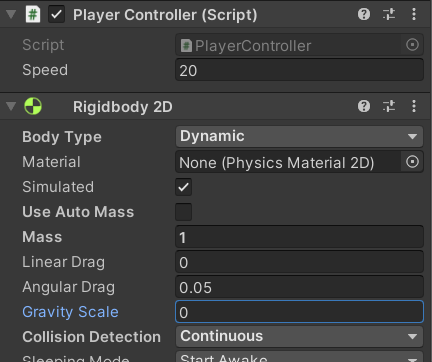
Set speed in the Inspector
I set my Speed to be 20 as well as the Gravity Scale of the
Rigidbody to be 0 (because we do not have gravity in this game). Also, I set the collision of
the Rigidbody to be Continuous.
Draw some tiles and test out your game’s movement.